
Shinchan is a fun-loving character from Japanese manga and anime series. In this tutorial, we will learn the simplest way to draw Sinchan.
Shinchan is just five years old and often gets into trouble because of his playful and sometimes naughty behaviour. So, if you want to draw the character, be with us till the end. By the end of this tutorial, you will be able to pull the creature perfectly.
Art Materials & Equipment
- Drawing Paper
- Colors of Your Choices
- Pencil
- Eraser
- Sharpener
- Marker
- Pen
Steps To Draw Shinchan
The image below provides a brief guide for today’s drawing. To draw Shinchan step by step, follow the steps below.
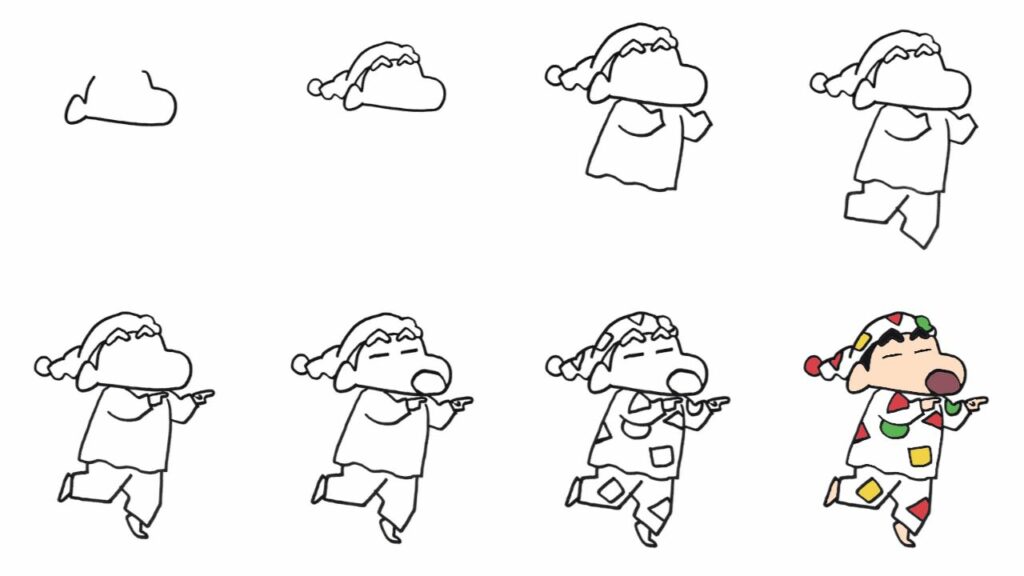
Step 1: Start With Head
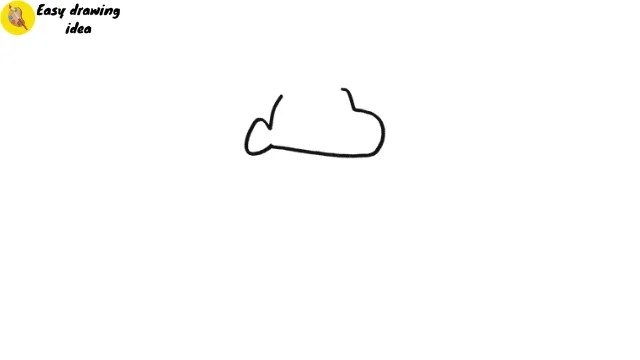
As shown in the photo, draw a slightly curved shape for the head, making the shape of the ear on the left, and a somewhat C-shaped shape going upward to complete the shape of the head.
Step 2: Draw A Hat
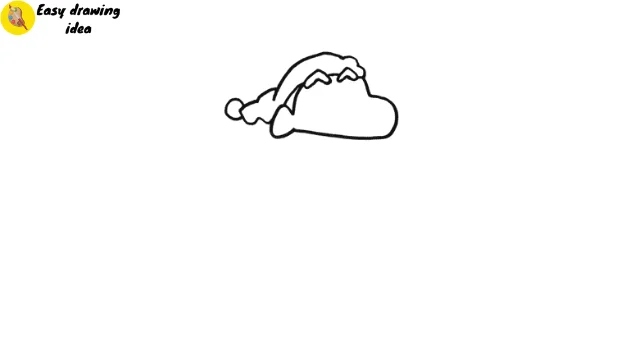
Above the head, draw a triangle shape with a slightly curved bottom. Then, draw a small circle at the bottom of the hat. Also, draw two curved lines at a distance for the eyebrows.
Step 3: Sketch the Upper Body And Arms
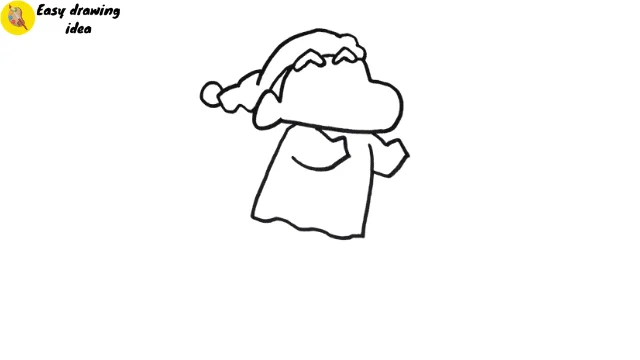
Draw a rectangle form with a slight curve at the button for the upper body. Then, extend two lines from each side of the body to the arms. Ensure the character’s body is tuned in correctly, as seen in the picture.
Step 4: Draw The Pajama
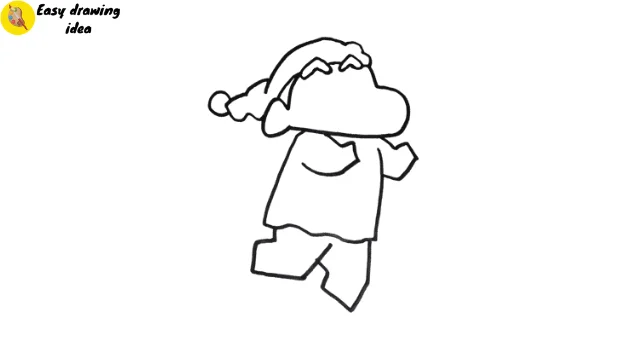
Now, draw two parallel lines extending downward from the bottom of the Sinchan’s upper body, ensuring they’re slightly curved to represent the bottom of the Sinchan’s outfit. For the left leg, angle it slightly upward from the back.
Step 5: Make Legs And Hands
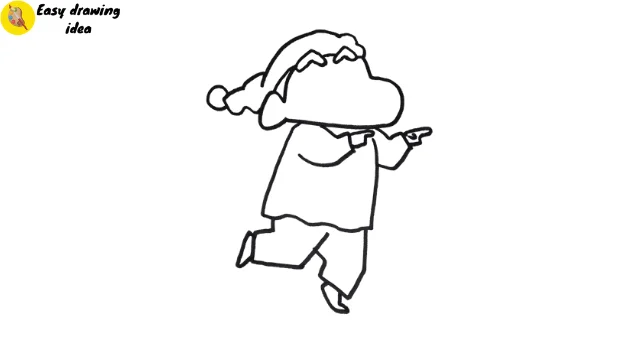
Sketch small curves at the front of the character’s leg to represent the foot. Then, refine the hand of the character by adding little fingers, as shown in the picture.
Step 6: Add Facial Features
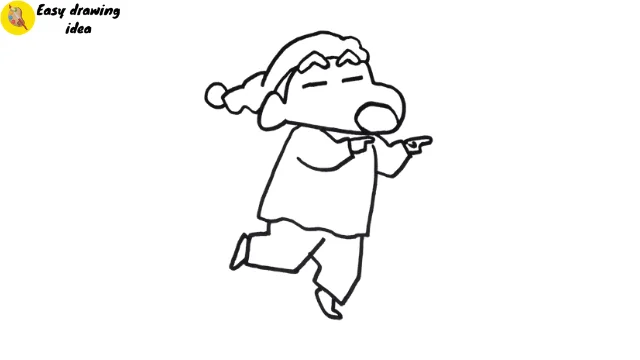
Then, below the eyebrows, draw two small lines to represent his closed eyes. Sketch a small circle just below the eyes to represent Shinchan’s mouth. This circle should look as if the character is opening his mouth.
Step 7: Add Texture To The Outfit
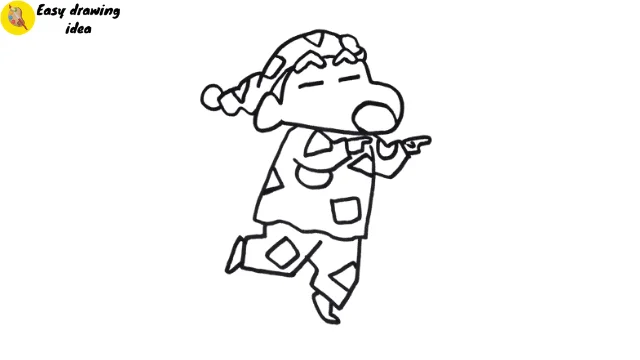
Let’s add a few small rectangles and triangles randomly scattered around the outfit and hat he is wearing. This will give the character an exciting touch.
This will complete our drawing part. Let’s proceed to the coloring part to make the sketch more enjoyable.
Coloring Shinchan
Once the drawing of the Shinchan is complete, start following the coloring process. We have selected some primary colors.
We started by adding black to the character’s eyebrows and hair. Marron was used inside the character’s mouth, and cream was used on the face and hands. For the pajama pattern, we used red, green, and yellow. You can complete the coloring process using the image provided.
Color Details:
- Red
- Green
- Yellow
- Cream
- Black
- Marron
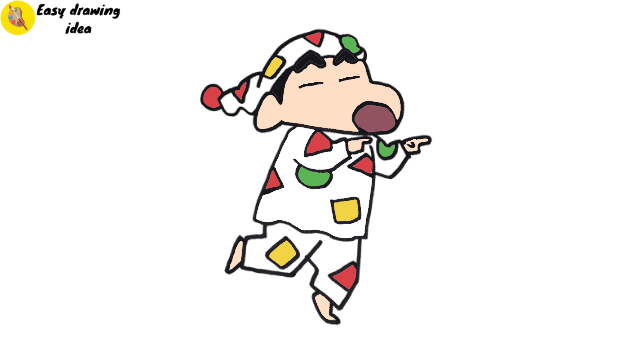
Finally, Shinchan is ready with fun, colorful pajamas. We hope you loved the process. We have used pencil colors; you can use any of your preferences, like crayon or watercolor. But we suggest you use a pencil to avoid messing up the sketch.
Our Artwork is Complete
We’ve successfully drawn Shinchan and added color to it. We hope you find our tutorial easy.
If you enjoy it, then leave a comment. Also, if you have any feedback, requests, or questions, please share them with us. We value your input and look forward to hearing from you!