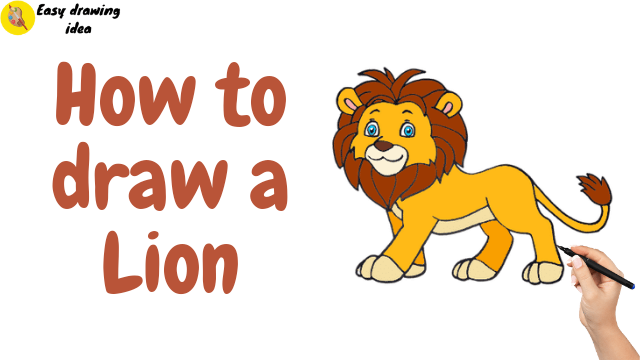
Lions are often depicted as “kings of the jungle.”They are large carnivorous animals that live mostly in grassy areas of Africa called savannas. Today, in this tutorial, we will learn how to draw a lion easily.
We have designed this tutorial for beginners and experienced artists so that anyone can draw it perfectly. Follow the steps below and enjoy every step of the process to draw a cute cartoon version of a lion.
Art Materials & Equipment
- Drawing Paper
- Colors of Your Choices
- Pencil
- Eraser
- Sharpener
- Marker
- Pen
Steps To Draw A Lion
Here are the brief instructions for today’s tutorial and attach pictures to complete your sketching efficiently. Follow the steps given to draw a lion, and by the end of this tutorial, you will learn to draw it perfectly.

Step 1: Rough Basic Shapes
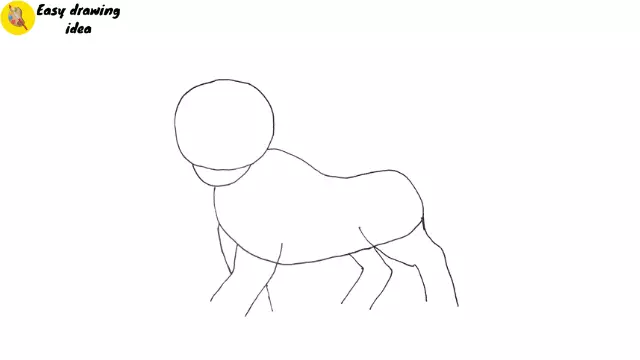
Start by drawing a rough, large oval for the body with a curve in the back and a smaller circle for the head. Connect both with a small line to form the neck. Add four lines stretching down from the body to represent the legs. Place four legs in a similar position as displayed in the image to avoid messing up later. We are using a pencil to draw these rough sketches as we will erase it all on the further steps.
Step 2: Outline The Mane

Sketch a rough large, rounded shape above the head, making it somehow fluffy, as shown in the image above. Also, draw a two-curve line to represent the tail of the lion. These a skeleton part drawn just for guiding on further steps.
Step 3: Detail The Mane And Ears
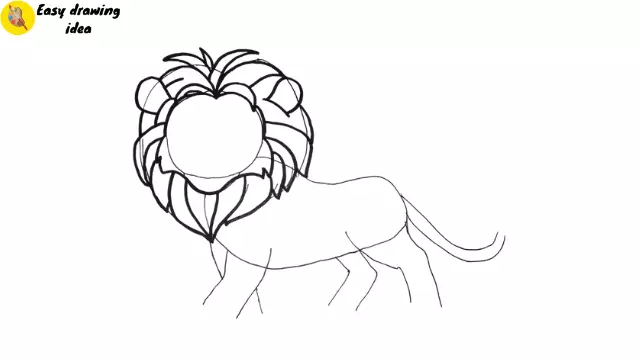
Add several curved lines to create a fluffy, layered look inside the large mane shape that you drew earlier. Make it look natural and dynamic. Then, draw an oval shape from both sides of the head for the ear to give it a deep look. Add another c-shaped shape inside of it to refine it.
Step 4: Refine The Body
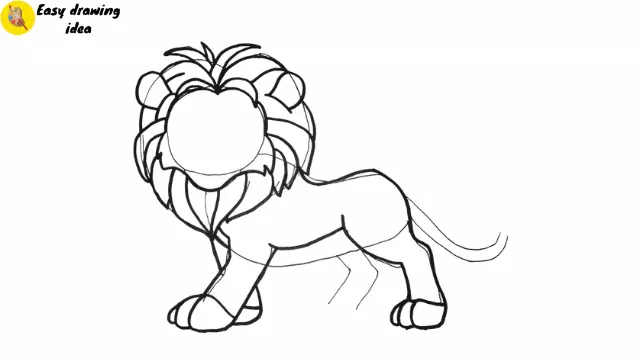
Following the rough line, draw the lion’s body shape as shown in the picture. Sketch the legs and add a circle for the paws at the end of each leg.
Step 5: Completely Draw The Legs And Tails
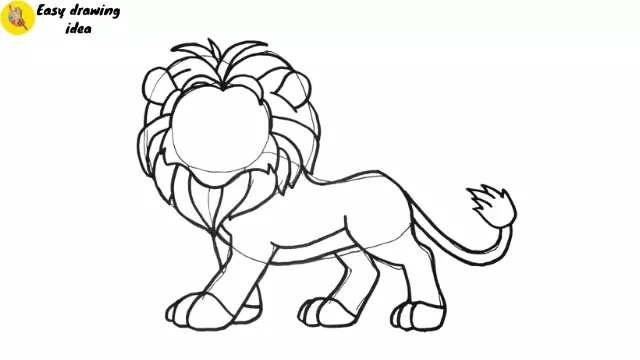
Following the same process, draw the right corner legs and add paws. Outline the previously drawn curved line for the tail, making it slightly thicker. At the end of the tail, draw a tuft of fur by adding several minor lines.
Step 6: Remove Extra Lines
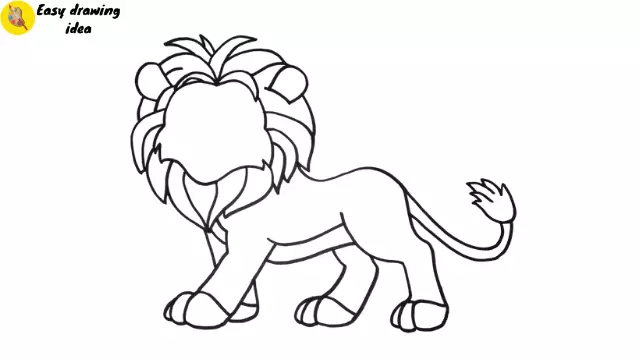
Erase all the rough lines that we made to make our drawing easier. This will make our drawing neat and detailed.
Step 7: Add Facial Features
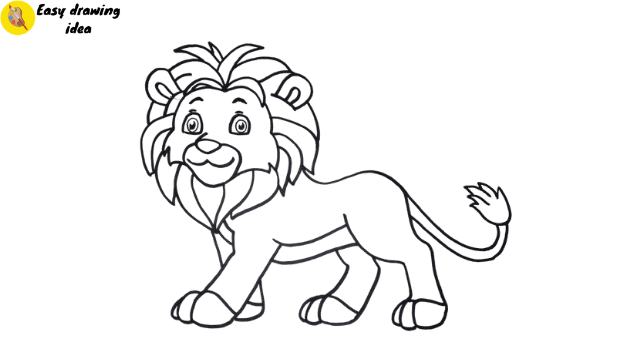
Now, draw two large, round eyes inside the head and a small circle inside each eye for the pupils, and again, give a tiny dot inside to provide a natural look. Draw a small triangle for the nose in the middle of the face. Add two curved lines coming down from the bottom corners of the nose to form the top of the mouth. Then, complete the structure by adding a curved line for the smiley face.
Finally, we have completed our sketching. If you are interested in adding a touch of color, follow the guide below. Let’s enjoy coloring as well.
Coloring The Lion
We have used some basic colors. You can use color according to your choices too.
We have used a bright blue color for the eyes to give them a highlighted look. Pink has been used inside the ears. We used brown at the bottom of the tail, and we used some primary colors. We have used bright blue for the eyes to highlight them. Pink has been used inside the ears. We used brown paint on the bottom of the tail and in the mane. Yellow has been used inside the body, ears, and tail. We have used cream color on the outer part of the body. For the nose, we used brown; for the mouth, we used cream color.
Color Details:
- Brown
- Yellow
- Blue
- Pink
- Cream
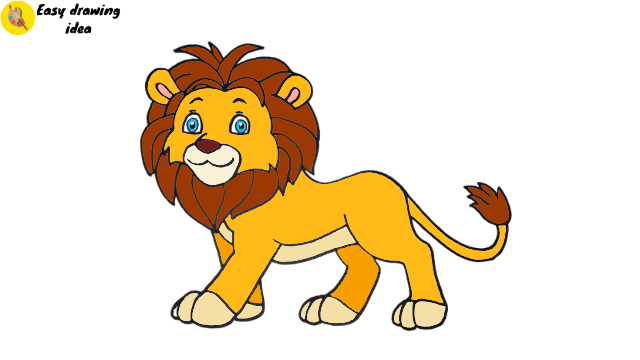
Finally, we have our cute-looking cartoon version of the lion ready. We hope you enjoy the process.
Our Final Artwork Is Ready
Here we draw a lion step-by-step easily. We hope you like the sketching and coloring process.
This tutorial is for both beginners and experienced artists. Please share your experience or feedback with us. We value your input and hope to see you again.


